Veeam Backup for Microsoft 365 has an error in one of the mailboxes. The error message is “There is an error in XML document…The specified type was not recognized: name=’SharingMessage’.

It happened after I upgraded the VBM365 from version 6 to version 7a. This error is a known issue, and Veeam released a HOTFIX on December 15. Please download the HOTFIX from https://www.veeam.com/kb4527 and follow the steps to fix it.
1. Login to Veeam Backup for Microsoft 365 Manager server.
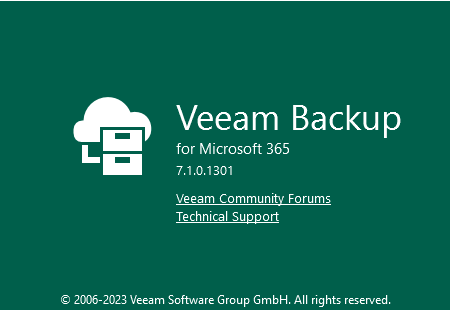
2. Open Veeam Backup for Microsoft 365 Console.
3. Verify the Veeam Backup for Microsoft 365 version from Veeam Backup for Microsoft 365 console (Help |Abut).
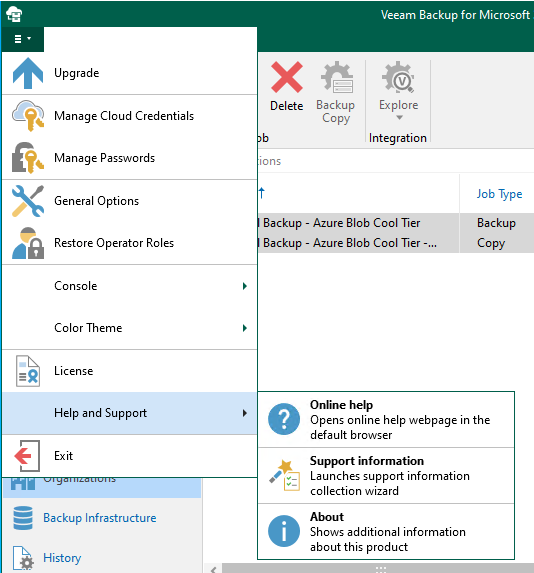
4. Ensure the Version is 7.1.0.1301 or 7.0.0.4388.
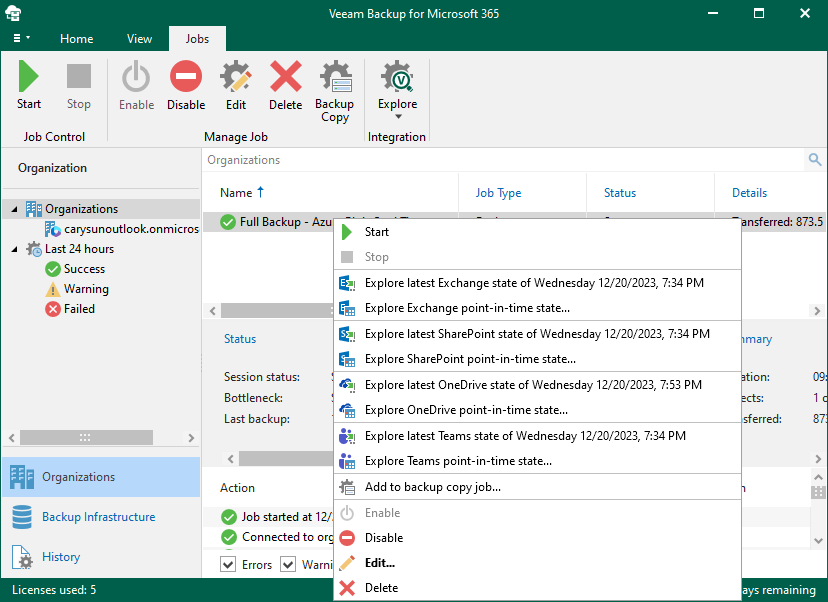
5. Right-click all jobs and select Disable to stop all active tasks.
6.
Close the console and stop the following services on the Veeam Backup for Microsoft 365 server.
Veeam Backup for Microsoft 365, Veeam Backup Proxy for Microsoft 365 and Veeam Backup for Microsoft 365 RESTful API.

7. Open https://www.veeam.com/kb4527, sign in to your Veeam account and download the HOTFIX.
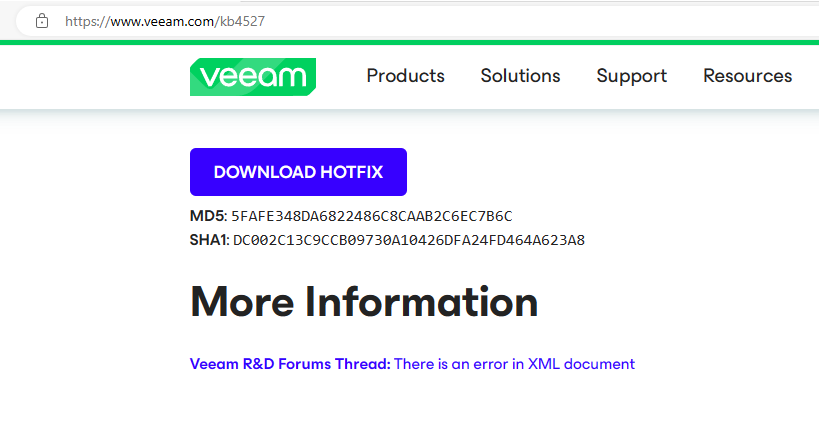
8. Exact the HOTFIX file.

9.
Open PowerShell as Administrator and run the cmdlet below to unblock the files.
Get-ChildItem -Path “C:\Post-install\KB4527\” -Recurse -Force | Unblock-File

10.
Backup the original DLL (Veeam.Ews.dll) at the following locations and replace them with the HOTFIX files.
C:\Program Files\Veeam\Backup365, C:\Program Files\Veeam\Backup365\Packages\Proxy, C:\Program Files\Veeam\Backup and Replication\Explorers\Exchange and C:\Program Files\Veeam\Backup365\Packages\Appliance\ .

11.
Start the following services on the Veeam Backup for Microsoft 365 server.
Veeam Backup for Microsoft 365, Veeam Backup Proxy for Microsoft 365 and Veeam Backup for Microsoft 365 RESTful API.

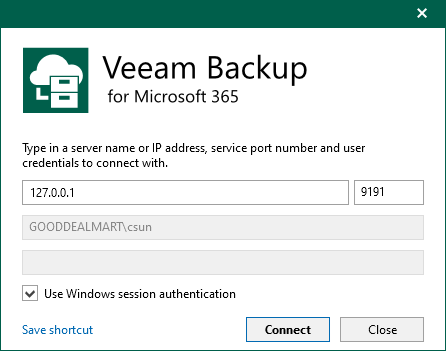
12. Open Veeam Backup for Microsoft 365 console and click Connect.
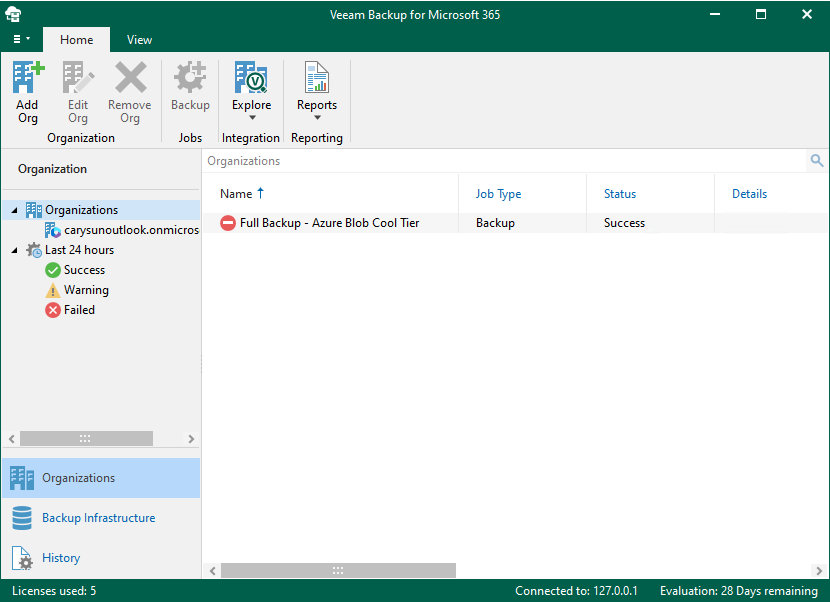
13. Select Backup Infrastructure on the Veeam Backup for Microsoft Console Home page.
14. Right-click Backup Proxies on the Backup Infrastructure page and select Upgrade.
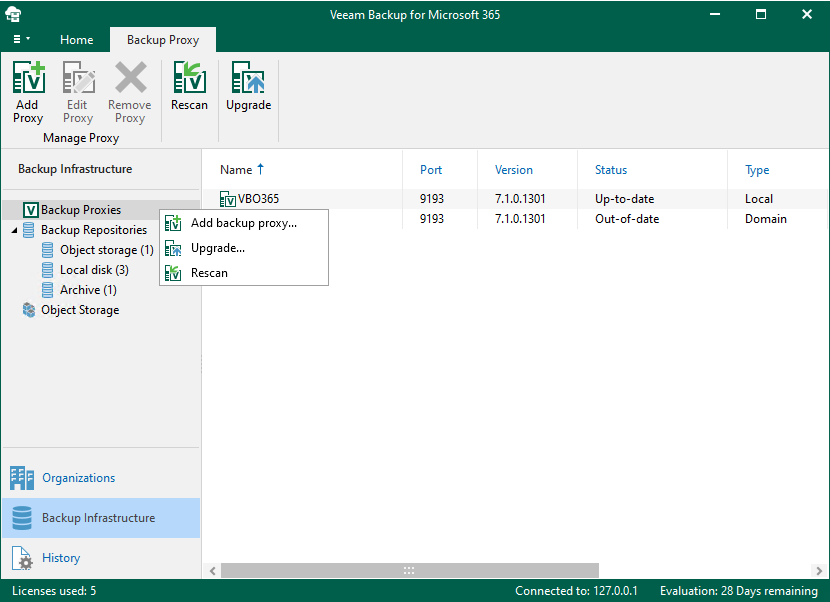
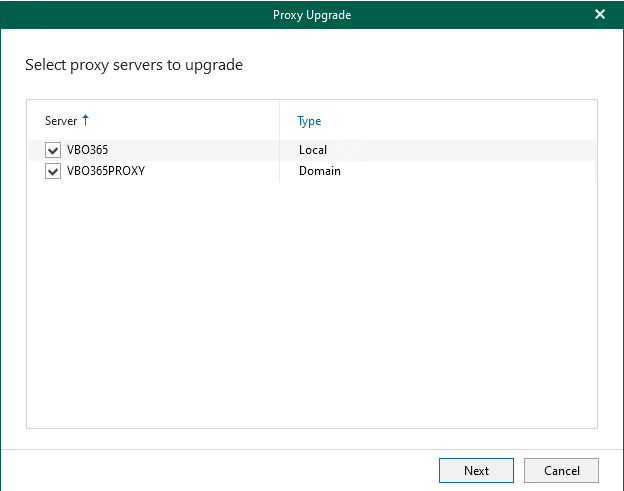
15. Select all servers on the Select proxy servers to upgrade and click Next.
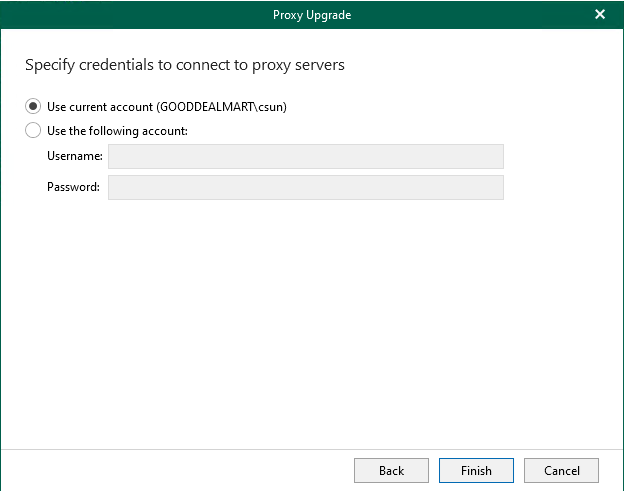
16. Click Finish on the Specify credentials to connect to proxy servers.
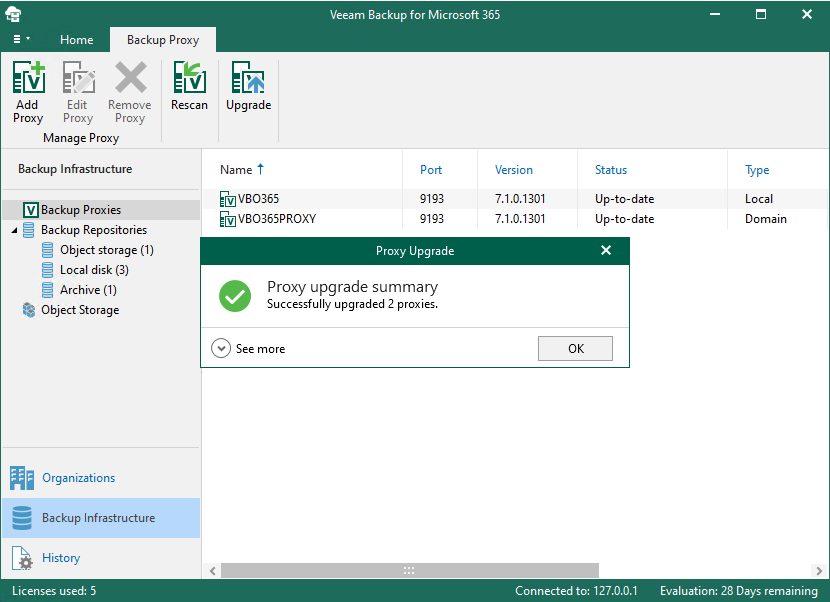
17. Ensure all proxy servers are up-to-date and click OK.
18. Login to the Veeam Backup and Replication Manager server (or remote Explorers).
19.
Backup the original DLL (Veeam.Ews.dll) at the following locations and replace them with the HOTFIX files.
C:\Program Files\Veeam\Backup and Replication\Explorers\Exchange
20.Retry the failed jobs and ensure they are successful.
21.Reenable jobs.
I hope you enjoy this post.
Cary Sun
X: @SifuSun
Web Site: carysun.com
Blog Site: checkyourlogs.net
Blog Site: gooddealmart.com
Amazon Author: Amazon.com/author/carysun
Author: Cary Sun
Cary Sun has a wealth of knowledge and expertise in data center and deployment solutions. As a Principal Consultant, he likely works closely with clients to help them design, implement, and manage their data center infrastructure and deployment strategies.
With his background in data center solutions, Cary Sun may have experience in server and storage virtualization, network design and optimization, backup and disaster recovery planning, and security and compliance management. He holds CISCO CERTIFIED INTERNETWORK EXPERT (CCIE No.4531) from 1999. Cary is also a Microsoft Most Valuable Professional (MVP), Microsoft Azure MVP, Veeam Vanguard and Cisco Champion. He is a published author with several titles, including blogs on Checkyourlogs.net, and the author of many books.
Cary is a very active blogger at checkyourlogs.net and is permanently available online for questions from the community. His passion for technology is contagious, improving everyone around him at what they do.
Blog site: https://www.checkyourlogs.net
Web site: https://carysun.com
Blog site: https://gooddealmart.com
Twitter: @SifuSun
in: https://www.linkedin.com/in/sifusun/
Amazon Author: https://Amazon.com/author/carysun
